Below is the audiovisual accompaniment for the article 'Hiding in Plain Sight: A Forgotten Piece in the “Cosens Lute Book”, penned in the Lute Society Quarterly Volume 57, no.4.
Journal Link: Here
Your Custom Text Here
Below is the audiovisual accompaniment for the article 'Hiding in Plain Sight: A Forgotten Piece in the “Cosens Lute Book”, penned in the Lute Society Quarterly Volume 57, no.4.
Journal Link: Here
This lecture recital was presented to the faculty of fine arts and music (university of melbourne) in fulfillment of the master of Music performance research course. It outlines the findings of the dissertation In Dowland’s Own words: Lachrime and Flow my Tears which explores the relationship between the lute song Flow my Tears and the instrumental dance Lachrimae pavane. The research is guided by the question:
How can the stylistic, rhetorical and contextual information found in the setting of Flow my Tears be interpreted to develop an authoritative performance guide for the Lachrimae Pavane?
Chapters: Presentation 0:00-40:00 Performance 40:00-46:00
A lecture recital exploring the relationship between Dowland's Lachrimae Pavane and the lute song Flow my Tears. Presented to the research faculty of fine ar...
Tweaking, monitoring and replacing gut frets is certainly one of the more tiresome aspects of playing historical plucked instruments. However, it is also one of the most important. If done correctly, your notes will have a purity, clarity and resonance that can never be achieved if the frets are poorly tied (or in some cases, if the neck is not properly shaped to support the gut frets).
A poorly tied fret usually doesn’t have enough tension to pull the fret flush against the fingerboard on the bottom edge, meaning many notes on the top G string will sound muted, muffled or muddy. This can sometimes be an artefact of a fingerboard that has not been adequately rounded at the edges to support the frets – however this can be diagnosed easily, as explained below. Old frets also cause similar issues when the fret is so drastically worn down that the strings no longer clear the neighboring frets.

An example of a fret that is is on its very last legs. Producing a reliable sound with this instrument (in this state) would be very difficult.
Hopefully the tips below will help you tie frets like a pro and avoid wastage, breaks, slips and buzzes. Some of these tips I have learned from luthiers, some from professional players and some I have learned through tying hundreds of my own frets over the years.

The two most common brands of Gut frets in my area are Kirschner and Aquila (although there are certainly many more available). Kirschner tend to make rather stiff frets while the equivalent gauges in Aquila are much more flexible. Nowadays I always go for the most flexible fret I can get my hands on as this really helps the fret to hug the fingerboard and makes tying the knots that much easier. If however, you have a rather heavy playing style (particularly with the left hand) stiffer frets can be more resistant to wear and will last longer before they need to be replaced. Whilst this may seem like a rather appealing prospect, stiffer frets can be harder to tie and more prone to bubbles (gaps between the fret and the fingerboard) which lead to dead notes on the strings. Synthetic frets (such as those made by Aquila) are, in my experience, a bit of a waste of time as they don’t sit completely flush on the fingerboard - or at least I couldn’t get them to after dozens of attempts. I was able to get them to sit flush for a day or two but the knots wouldn’t hold the tension (as they aren’t able to be burned) and slowly they would sag and come loose.
I know it sounds a bit odd, but soaking the bottom fold of your fret in some water for a few minutes helps the keratin in the fret to become softer and more flexible. This in turn helps the knot sit flush around the bottom corner (chanterelle side) of the fingerboard – this is the most crucial spot to watch when re-fretting as it must not have any bubbles (or gaps) in it. If it does, you must start again (or check that you don’t have any dips or dents in the fingerboard itself). The fingerboard should be either completely flat with the edges rounded, or slightly convex with the edges rounded. If it is at all concave, or if the edges are sharp corners, the fret will not work properly and the fingerboard will need to be planed until it is either of the former two profiles- I cannot stress how important this is, it can completely transform the sound of your instrument.

This is a clear example of frets that are not sitting flush against the fingerboard. The thin stream of light that appears at the bottom edge of the fret is a good way to diagnose a bubble or gap.
I often see people cut their fret to approximate size when re-fretting and then tie the fret in place. There are two problems I have with this approach:
1 – you have less of a tail of fret to hold as you pull the fret snug – sometimes if this length is misjudged you will need to use pliers to pull the little tail of fret in place – and this is very fiddly.
2 If there is enough of a fret tail left over for you to grab and wrap around your finger, you have certainly wasted too much fret (sometimes double the amount you need)!
The best way to tie the frets is to tie them straight off the spool they come in. This way there is no waste because one trims the fret after it has been tied AND you have plenty of fret tail in your hand to allow you to really snug the fret in place.
Lighters are a good portable backup, but soldering irons are the safest and most accurate method. I find it especially difficult to use lighters on archlutes and theorbos because the flame sits directly under the diapason strings when you are sealing the knots on the fingerboard….it doesn’t take much to burn right through the diapason strings….believe me I have done it! A soldering iron lets you control the burnt nibs on the ends of the frets and allows you to cap the knot with precision. There is also no risk of harming the finish of your instrument (and the other strings) with unnecessary flames.
If you are having difficulty with your action, but don’t want to fiddle around with your nut- remember that the frets themselves can adjust this. Re-fretting the first fret (and subsequent frets) with a thicker gauge will lower your action and re-fretting your first (and subsequent) frets with a thinner gauge will raise your action.
This is quite a well known tip, but worth mentioning anyway. When your fret starts fraying, have string divots in them or the the strings start buzzing, you can pull the fret back (toward the peg box) until it is loose and spin it 180 degrees so the knot is just under the bottom corner of the fingerboard (under the top or thinnest G sting). Then you can slide the fret back up into position and if the knot holds up you should have a fresh face of the fret with no bubbles because the kinks in the frets from the fingerboard edges have simply swapped spots from top to bottom. This can give double the fret life and is a great tip for emergency situations…be prepared that it sometimes won’t work if the fret is too far gone or the knot doesn’t hold.

Mace’s Symbol Depictions of the most common ornaments seen in lute music
According to Thomas Mace, ornamentation is “the adorning of your play” and the “beautifying and painting of your fabric.”[1] To play a piece as it is written on the page, without ornamentation, would have probably been uncommon in the 16th and 17th century. Whilst ornamentation is a huge topic, with many topics and variations, today we are focusing on ornaments that modify individual notes, known as '‘graces’. Graces were used by Renaissance musicians to add interest, humour, or character to their playing. There were many to chose from, as Thomas Mace lists fifteen different graces “which we must commonly use upon the lute.”[2]
Of these fifteen ornaments, the ones most commonly used by modern HIP lutenists are described below. These graces are marked by their French symbols in Mace’s examples, but many of these graces were used by Dowland and the English lute composers. In most of the key English tablatures, such as the Board Lute Book, Pickeringe, and Holmes, the primary ornaments used were falls, trills, mordents and back-falls.

Mace describes that “[the soft loud play] (which I (my self) only call a grace; because no master ever yet (as I can find) directed it, as a grace, but myself) is to play some of the lesson loud, and some part soft; which gives more grace and lustre to play, than any other grace whatsoever: Therefore I commend it as principal and chief ornamental grace (in its proper place).”[3]

Open: an open string is plucked and ‘hammered’ once (or as many times as is required) by the index finger on the first or second fret. In this case the open string is the tonic note, and therefore must be the last note played.
Stopped: this is the same as the open shake. However, the first note plucked is a fretted note and is hammered with the second or third finger on a sequential fret.

The half fall is essentially a slur to the tonic note from a semitone below the tonic note. It is not shaked (therefore there are only two notes in the grace).

Mace suggest that the whole fall was much out of use by the late 17th century but “it is good, and handsome, and may give delight.”[4] It is similar to the half fall but requires two (diatonic) notes to be played before reaching the ‘true’ note. For instance, to ornament the note ‘c’ (not the fret c) one would play ‘a’ and ‘b’ before landing on ‘c’.

The backfall is used often in modern recordings and involves playing a note either a tone or semitone above the true note and ‘pulling off’ onto the tonic note. This can be repeated to create a shaked backfall or left plain with only one pull-off.

The beat is also commonly used by lutenists today. One plucks a starting note, pulls off to a lower note (either a tone or semitone depending on the key) and then hammers back on to the starting note. Mace stresses the importance of playing this last note loud enough to “be eminently heard [as] the very last [note]”, he goes on to say whatever your grace, you must in your fare-well express the true note perfectly, or else your pretended grace will prove a disgrace.”[5]

Essentially, this is a hammer-on from one note to another.

This is the opposite of the slur, or a pull-off from one note to another.

The sting was an ornament that appears to have been popular in the 16th century. By the time Mace and The Burwell Lute Tutor are writing about ornaments “the sting is no more in use.”[6] But according to Mace, “for some sorts of humours, [it is] very excellent.”[7] To perform the sting one must producing a rather wide and obvious vibrato “to make the sound seem to swell with pretty unexpected humour.”[8]
Many of these same ornaments are discussed by The Burwell Lute Tutor, who cautions that “all these things must be done without losing the measure and with moderation, and not so often as it may be loathsome to the ear.”[9]
[1] Mace, "Musick's Monument," 102.
[2] Ibid.
[3] Ibid., 110.
[4] Ibid., 105.
[5] Ibid., 109.
[6] Rogers and Burwell, The Burwell Lute Tutor, 36.
[7] Mace, "Musick's Monument." P. 109
[8] Ibid.
[9] Rogers and Burwell, The Burwell Lute Tutor, 36.
[Disclaimer:] Dogmatic insistence that one should hold their hand adjacent to the strings, at a 45-degree angle, use nails, don’t use nails or play with the 'thumb out’ or the ‘thumb in’ seems a counter productive and limiting approach to the music of this era. For the vast majority of modern lutenists, playing on modern (replica) instruments, built with modern tools, and with modern strings, the specifics of one’s technique need not necessarily fastidiously replicate that of a Renaissance lutenist, as modern instruments undoubtedly respond in different ways. Moreover, many of the treatises themselves disagree about the appropriate way one should carry their hands, or pluck various chords.
A further complication is that many of these treatises were written (rather ambitiously) to instruct complete beginners on the fundamentals of Renaissance music theory, tablature, and technique. In doing so, the authors created steadfast rules that experience proves to be significantly hyperbolised, a point made clear by Bruce MacEvoy in his essay The Renaissance Thumb-Under Lute Technique:
All the tutors, for instance, in order to get across the need to sustain voices in a polyphonic composition, no more than tell the lutenist to hold down notes with the left hand until he is forced to release them to finger a new note, a rule he must keep, according to the Capirola manuscript, “like a maxim of Aristotle.”[1]
Experienced musicians will know that sustaining notes in this way requires careful examination of fingerings and a detailed understanding of the counterpoint (in order to first determine which voices should be sustained and then for how long).[2]
However, through an analysis of the techniques outlined in historical treatises, much can be revealed about the subtle articulations that were favoured by Renaissance musicians. It is these points that should be of most significance to scholars as they reveal tangible sonorities that a modern performer can replicate, regardless of the specific technique (or even instrument) used to achieve them. I would encourage readers to use these techniques as a starting point and to further experiment to find the technique that draws the fullest potential out of your instrument.
The specific posture of the right hand has a profound effect on the performance of Renaissance lute music. As a guitarist, one will have been taught to play (perhaps without realising it), using a technique inspired by Baroque lutenists called thumb-over or Thumb-out. This technique (although used by some German lutenists since the mid-16th century)[3], was discussed in popular lute treatises from the turn of the 17th century and flourished throughout the Baroque. When using the thumb-over technique, the thumb is extended out towards the rose, and the fingers are loosely held in the manner of a fist.
However, Renaissance lutenists mostly favoured the thumb-under technique whereby the thumb is nestled inside the fingers of the right hand, and diminutions are played through an alternation of thumb strokes and strokes of the index finger. This technique is described by Thomas Robinson in 1603:
Begin to strike the string downward with the thumb only, and also striking with your thumb behind your fingers…striking them [the strings] with your forefinger before your thumb, that is holding down your thumb behind your fingers.[4]
With this technique, the pads of the fingers should attack the courses without letting the nails touch the strings. When the hand is held in the thumb-under position, the strings should make contact with the fleshy (heel) side of the fingertip to produce a warm and rounded tone. On lightly built Renaissance lutes It can be more challenging to achieve this warmth whilst holding the hand in the thumb-over position.[5] However, playing in the thumb-over position does have its advantages, such as greater accuracy and facility during index-middle finger divisions (which must be fluent in any renaissance lute technique, and ideally as agile and fast as thumb-index finger divisions).
In MacEvoy’s essay, he describes that thumb under technique (used without nails) “brings to mind with a new meaning all the Renaissance metaphors for the lute’s tone as gentle, sweet and soothing.”[6] An example of thumb-under technique can be seen in Figure 1. A portrait by Giulio Campi, possibly of Francesco Canova da Milano (1497–1543)

Figure 1. A portrait by Giulio Campi, possibly of Francesco Canova da Milano (1497–1543)
As the thumb-under technique supplanted the monophonic plectrum technique of the Middle Ages,[7] it allows the player, with “the kind of bobbing motion that would carry a plectrum swiftly back and forth across the course”[8] the ability to play rapid monophonic passages, whilst also facilitating the realisation of polyphonic lines. The thumb-under technique is therefore perfectly equipped for the music from the 16th century. When playing with the thumb under (as we can assume the vast majority of Renaissance lutenists did), one imbues the pieces with an array of subtle accents and nuances that serve to enhance the performance of 16th-century works.
I have seen both thumb-out and thumb- under players achieve fantastic results at the highest levels, and in all honesty it doesn’t really matter which you choose….it is far more important and worthwhile devoting your curiosity to attacking and preparing the courses properly. This is what makes a lute sing, regardless of the technique ones uses to achieve it. The specifics of plucking the courses is such a delicate and difficult concept to explain (even in person with an instrument in hand) that there is a little chance one could grasp the concept through text (and even less chance a teacher could accurately describe the process in plain English). It seems historic lutenists shared this sentiment, as this topic is almost never discussed (or at least not in the amount of detail it deserves) by historic lute treatises; this is the most fundamental technical aspect of lute playing that routinely presents students with a significant technical hurdle….perhaps some things can only be passed down from teacher to student!
In Renaissance right-hand technique, the little finger is planted on the soundboard of the lute somewhere between the rose and the bridge. Although it will seem foreign to most guitarists, the little finger serves to anchor the right hand upon the belly of the lute, and is perhaps the only topic that is unanimously endorsed by all of the historic lute treatises. This technique is illustrated in Figure 2. Marco Palmezzano (c.1460-1539) -The Virgin and Child Enthroned, 1513.

Figure 2. Marco Palmezzano (c.1460-1539) -The Virgin and Child Enthroned, 1513.
This technique is mentioned by Adrian le Roy in 1568, stating that “[the] right hand little finger supports [the] hand on [the] belly of the lute.[9] It is reiterated by Thomas Robinson in 1603:
And now for your right hand, called the striking hand, leane upon the belly of the lute with your little finger only, and that, neither too far from the treble strings, neither to neare, and although you ought to leane lightly, yet carie your hand steadily, not sliding out of his place.[10]
Planting the little finger in such a manner “steadies the hand, and gives a certainty to the grasp.”[11] When playing with the thumb under, the little finger should naturally rest on its outer edge (furthest from the thumb) and, out of necessity, can pivot or slide vertically as the hand stretches to reach lower bass strings. This is particularly relevant on late Renaissance lutes of eight or more courses, but for the most part, it was made clear that the little finger should stay as still as possible. As The Burwell Lute Tutor states, “your hand must lie upon the belly of the lute with the little finger only, which must be as it were glued unto it.”[12] To a guitarist, this technique may initially feel clumsy, like an experienced cyclist using training-wheels on a bike; however, the planting of the little finger on the lute (especially late Renaissance lutes of nine or ten courses) aids the thumb in navigating the large gaps between the diapasons (bass strings). Mace states:
And your thumb spanned from it [the little finger], to the last, or twelfth string, from which place (by the advantages of the certainty of the little finger’s place, being surely kept) you shall first practice to hit all your basses.[13]
However, planting the little finger on the soundboard does significantly reduce the mobility of the ring finger, which (in the context of a thumb-over technique) can prove off-putting to guitarists. It is quite possible that this limitation is directly responsible for the ring finger’s rather rudimentary use in Renaissance music, where it is employed only to play the top note in chords of 4 or more voices. For instance, Thomace Robinson instructs as follows:
For to play four parts, it is easie to be understood that the thumb and the three fingers together, serve easily to strike the four strings or parts, each doing his part in striking upwards and downwards.[14]
However, by the mid 17th century (when thumb-over was being established as the primary right-hand lute technique) the ring finger ceases to be used in lute and theorbo playing. Piccinini and Mace make no mention of the third (ring finger) and the Burwell tutor speaks only of its archaism:
If there be three small strings together you must not strike them as people did formerly with three several fingers [i, m, a], but with the forefinger only, sliding from the treble upwards over the strings and repeating sometimes the treble with the middle finger.[15]
This evidence suggests that the planting of the little finger was an uncompromising aspect of lutenists technique, worthy of completely sacrificing the use of the ring finger. The merits of this technique were recognized and implemented by guitarists as late as the 19th century. In his treatise Méthode Complète pour la Guitare, Fernando Sor writes:
Sometimes I employ the little finger, pressing it perpendicularly on the sounding-board below the first string, but take care to raise it as soon as it ceases to be necessary. The necessity for that support arises from passages requiring great velocity of the thumb to pass from base notes to those of an intermediate part.[16]
Some six years later, the same technique is described by Dionisio Aguado in La Guitare, Méthode Simple, where he states that: “it is customary to place the little finger on the belly, probably in order to find a resting point for the right hand, and at the same time to attain force and certainty in playing.”[17] In light of this evidence, it can be conservatively assumed that the technique of planting the little finger on the soundboard was used by lutenists and guitarists for over 300 years. In light of how drastically other aspects of right-hand technique changed from the 16th to the 19th century, the continued use of the little finger in steadying the hand is evidence of its significant merit in playing early lute and guitar repertoire.
Playing with nails has become a fundamental part of modern guitar technique and an understanding and implementation of well-shaped nails largely dictates a modern player’s tone, articulation, and clarity. One of the first guitarists to have used nails was Francesco Corbetta. Thanks to accounts from Adam Ebert’s Aulus Apronius, we know that an untimely broken nail forced Corbetta to abandon a concert in Turin:
The world-famous guitarist Corbetta, who taught all the Potentates of Europe, came here from England. But because he had the misfortune to break a fingernail (and with old folk these are accustomed to grow again very slowly) it was impossible for him to present himself at the festival with his consort.[18]
Although we see the use of nails on the guitar as early as the 17th century, there were many guitarists who played only with the flesh of the fingers. The debate between those who played with nails, and those who didn’t, continued well into the 19th century. The iconic performer, composer and pedagogue Fernando Sor states in his Méthode Complète pour la Guitare:
Never in my life have I heard a guitarist whose playing was supportable, if he played with the nails. The nails can produce but very few gradations in the quality of the sound.[19]
According to Sor, the use of nails on the guitar “is, to mine, what the harpsichord was in comparison to the pianoforte.”[20] Perhaps the only guitarist who (according to Sor) came close to playing convincingly with the nails was Dionisio Aguado (another equally well respected virtuoso of the guitar). However, Sor writes that “it was only after many years that we met again, and he [Aguado] then confessed to me that, if he were to begin again, he would play without using the nails.”[21]
Perhaps the last 19th-century maestro of the guitar to play without nails was Francisco Tárrega. In his later years, unsatisfied with the sound of the nails, Tárrega cut them off and played with the fingertips alone. In Tárrega’s biography, his pupil Emilio Pujol writes:
Tárrega’s sensitive ears had adapted to the sounds of the orchestra, the string quartet and the cushioned hammer of the piano. His forays in the great name of Art were to give him nuances of expression which were not found due to his personal esthetic in an uneven, metallic and sharp timbre. . . . By not using the nail, he [Tárrega] consequently improved his touch and expressive action. As previously his touch had focused on the point between the nail and flesh, now the focus is the sensitive fleshy part of the fingertip.[22]
The use and discussion of the nails came to an abrupt halt in the 20th century. Andrés Segovia was almost entirely responsible for establishing the use of nails as the staple right-hand guitar technique. When asked about Tárrega’s (nail-free) technique Segovia was disparaging:
The so-called Tárrega method and his pupils’ ideas of right hand technique are absolutely stupid; one reduces the volume of the guitar and the differences in colour and timbre when using only the fingertips.[23]
Due to the popularity of Segovia and his followers, playing the guitar with the nails became the only ‘correct’ right hand technique. Centuries of discussion and debate on the use of the right-hand nails was repudiated by Segovia almost overnight. Since Segovia, the guitar has been slowly adapted to compliment the nails with modern soundboard bracing, reinforcements allowing the use of higher tension strings and a vast array of machine polished synthetic strings.
In direct contrast many lute makers pride themselves on historical accuracy when making their instruments. Using detailed historical plans, modern makers are now able to replicate lutes of the 16th–17th century with considerable accuracy. These instruments are lighter then the modern guitar, have a shorter neck with less frets, and perhaps most important of all, are strung with very low-tension gut or synthetic gut courses. If one attempts to use one’s nails on such an instrument “the delicate tone of the note itself is almost wholly colored by the metallic twang of the attack [of the nails].”[24]
Much as the guitar has been developed to suit the technique of its players, the lute was developed by Renaissance craftsmen to suit the technique of lutenists, who, except for a select few, played without nails. In a way, playing the lute with nails could be likened to a guitarist playing a modern concert guitar without nails; it’s not to say that a pleasant sound couldn’t be achieved, or that it’s in any way aesthetically ‘wrong’, it’s just to say that the instrument was not designed to be played in that way and the result is not ideal. Likewise, if a guitarist can find the courage to cut their nails and experiment with the sound that the flesh produces on the strings, an epiphany can occur. What can initially seem an awkward or clumsy technique begins to make great sense and serves, almost out of necessity, to hold the fingers in the position that draws the sweetest and purest sound from the instrument.
i. Nails: An Historic Approach
In any modern classical guitar method, there will almost certainly be a section dedicated to the shaping of the right hand nails, which is an art in itself that often requires a rather ‘scientific’ approach. As such a complicated and nuanced topic is not even mentioned until the early-to-mid-17th century, it can safely be assumed that lutenists of the 16th century would have played without nails. It is of course possible that some players inadvertently used their nails on the lute (letting them grow out of carelessness or indifference) but the evidence does not support the idea that 16th-century lutenists used their nails (like a guitarist) as a tool to facilitate their technical fluency or increase the tonal range of their instrument.
This hypothesis is supported by most 17th-century treatises, which agree that using one’s nails in solo playing will not yield the sweetest sound form the lute. As The Burwell Lute Tutor clearly states (with little room for misinterpretation) the nails should not come into contact with the strings:
Take heed that you never lay the little finger upon the bridge or behind the bridge, neither strike the strings with the nails, nor so hard as if you would tear them in pieces… For the nails, they must be short and smoothly cut (which some do with a little file).[25]
The instruction that the nails should be “short and smoothly cut” suggest that even a short but jagged nail edge has the potential to nick the strings and thus produce an undesirable sound. Similarly, Thomas Mace alludes to having experimented with the use of right-hand nails, but ultimately finds the most satisfaction from playing without them:
But in the doing of this, take notice, that you strike not your strings with your nails, as some do, who maintain it the best way of play, but I do not; and for this reason; because the nail cannot draw so sweet a sound from a lute, as the nibble end of the flesh can do.[26]
He does later “confess” (as if reluctant to side with the new radical nail players) that in chamber music or continuo playing the nails may help the lute to project over other consort instruments:
I confess in consort, it might do well enough, where the mellowness (which is the most excellent satisfaction from a lute) is lost in the crowd; but alone, I could never receive so good content from the nail, as from the flesh; However, (this being my opinion) let others do, as seems best themselves.[27]
Perhaps one of the lutenists who (according to Mace) “maintain it [playing with the nails] the best way of play” [28] could have been Alessandro Piccinini. In his early 17th century treatise, Intavolatura di Liuto et di Chitarrone, he does advocate the use of the fingernails in solo lute and theorbo playing, with perhaps the first ever instructions on shaping the nails for a pleasing sound.
The other three fingers i.e, the index middle and ring, ought to have somewhat longer fingernails. The nails should just pass beyond the flesh and be oval-shaped; that is, longer in the middle than at the sides. When you play a chord or a single string, touch the string with the tip of the flesh and push it towards the belly, letting the nail glide over both strings. This makes a beautiful sound, because you play both strings of the pair.[29]
On the other hand, Poulton describes Piccinini as a lutenist “who appears to [have been] somewhat eccentric in his time.”[30] It is also important to note that the instruments Piccinini played upon were the theorbo and arciliuto, which—due to their increased size and extra bass strings—perhaps benefited from the sharper attack of the nails in way that a Renaissance lute might not. Nevertheless, the case of Piccinini does demonstrate that nails were creeping into lute playing by the early-to-mid-17th century.
ii. Nails: A Modern Compromise
If cutting off one’s nails and holding the hand in the thumb-under position is at first too daunting a prospect (or perhaps one still needs to regularly teach or play the guitar), a possible compromise is suggested by MacEvay, who states that “some teachers have had good results with paring the nails down on the heel-side of the finger only, so that by leaning the fingers toward the thumb, nails can still be used for thumb-out performances.”[31] This allows a taste of the thumb-under technique (and the benefit of the articulations that it naturally produces) without having to drastically compromise a standard guitar technique.
[1] B. MacEvoy, The Renaissance Thumb-under Technique (1979), 5.
[2] Ibid.
[3] MacEvoy, The Renaissance Thumb-under Technique, 2.
[4] Robinson, "The Schoole of Musicke," Fol.3v.
[5] When playing in the thumb under hand position, the pads of the fingers are naturally positioned to pluck the strings by pushing them vertically (towards the soundboard) before releasing them. This vertical movement (long established as the optimum means of tone production on lutes) produces a full-bodied sound and sets the courses in parallel motion (preventing them from banging into one another). In the thumb over position, achieving the same vertical movement (without nails) can be harder, as the pads of the fingers tend to strike the strings laterally, producing a more brittle sound, and (potentially) sending the courses vibrating into one another.
[6] MacEvoy, The Renaissance Thumb-under Technique, 6.
[7] Ibid.
[8] Ibid.
[9] Adrian Le Roy, "A Briefe and Easye Instruction to Learne the Tableture," (Paris, 1571).
[10] Robinson, "The Schoole of Musicke," Fol. 3r.
[11] Mace, "Musick's Monument," 72.
[12] Rogers and Burwell, The Burwell Lute Tutor, 23.
[13] Mace, "Musick's Monument," 76.
[14] Robinson, "The Schoole of Musicke," Fol.9v.
[15] Rogers and Burwell, The Burwell Lute Tutor, 29.
[16] F. Sor and A. Merrick, Sor's Method for the Spanish Guitar (Dover, 2007), 33.
[17]Dionosio Aguado, La Guitare, Méthode Simple (London: R. Cocks & Co, 1836), 3.
[18] Richard Tilden Pinnell, "The Role of Francesco Corbetta (1615-1681) in the History of Music for the Baroque Guitar, Including a Transcription of His Complete Works. (Volumes I and Ii)." (University of California, 1976), 256.
[19] Sor and Merrick, Sor's Method for the Spanish Guitar, 17.
[20] Ibid.
[21] Ibid.
[22] E. Pujol, Tárrega: Ensayo Biográfico (Artes Gráficas Soler, 1978).
[23] G. Clinton, Andres Segovia: An Appreciation (Bold Strummer Limited, 1988), 20.
[24] MacEvoy, The Renaissance Thumb-under Technique, 6.
[25] Rogers and Burwell, The Burwell Lute Tutor, 23.
[26] Mace, "Musick's Monument," 73. Although this quote suggests that some early-to-mid-17th century lutenists had started to play with the nails, this group is still maintained by Mace to be the minority.
[27] Ibid.
[28] Ibid.
[29] Alessandro Piccinini, "Intavolatura Di Liuto Et Di Chitarrone," (1623), 9.
[30] Poulton, A Tutor for the Renaissance Lute, 7.
[31] MacEvoy, The Renaissance Thumb-under Technique, 10.
This Topic is of particular personal significance as it was an area I originally overlooked (perhaps in lieu of the multitude of other technical shifts that were occupying my mind at the time) when I first began experimenting with early plucked instruments. Nowadays it is one of the most critical and challenging facets of my lute playing, one that I am constantly improving, tweaking and streamlining to make my technique evermore ergonomic and comfortable.
Whilst there is a substantial collection of iconography depicting lutenists in various states of play, the credibility of these sources can be hard to determine. Andrea Damiani wisely cautions as follows:
One must be careful because these images are too easily interpreted; some depict parties and celebrations in which the posture represented is casual, rather than the correct position for serious study or performance.[1]
It is worth noting that the lute, unlike the modern classical guitar, comes in many different shapes and sizes, with varying numbers of ribs, as well as different neck lengths, string combinations, and bridge lengths. Whilst the ‘proper’ sitting position for the guitar has long been established with a footstool under the left leg and the guitar resting on the thighs of the player, there are several different ways of holding the lute, depending on the player and instrument.
On holding a lute for the first time, it quickly becomes apparent that the concave back of the lute is prone to slipping off the thigh and, unlike the guitar, will not support itself upon the player’s legs if both hands are taken off the instrument. Historical treatises instruct scholars to combat this by wedging the lute, with considerable force, against a table edge.
In The Schoole of Musicke, Thomas Robinson explains:
First sitting upright with your bodie, leane the edge of the lute against the table, and your bodie against the lute, not too hard for hurting your lute, neither for letting it fall, for the table, your body and your right arm, must so possess the lute, that you may have your left hand at libertie to carie to, and fro, at your pleasure.[2]
Some 70 years later, Thomas Mace describes holding the lute in an almost identical manner:
First set yourself down against a table, in as becoming a posture, as you would chuse to do for your best reputation. Sit upright and straight; then take up your lute, and lay the body of it in your lap a-cross; let the lower part of it lye upon your right thigh; the head erected against your left shoulder and ear; lay your left hand down upon the table, and your right arm over the lute so that you may set your little finger down upon the belly.[3]
Despite the clarity of both sources, I would advise against pressing an instrument so delicate against a wooden table edge and believe that the added impracticalities of carting a table to and from performances should, in itself, deter most from adopting this technique. What is important however, and clearly emphasised by both sources, is the need for the left hand to be free from supporting the neck of the lute.
You be this able to manage the holding of your lute with one hand…because the work of the left hand is the most difficult, and therefore must have no hindrance, or impediment, but must be free.[4]
Like a guitar, ones left hand should not take up any of the instruments weight, allowing it to move, unencumbered, up and down the neck of the lute. To prevent the lute from sliding (and without using a table edge) some use a conventional guitar strap attached to the lute at both ends or, as Daminai explains, “you can attach a leather cord to the button at the end of the instrument, then sit on the cord, using your own weight to support the lute.”[5] He goes on to suggest one can also “put a leather, (or some other material) cloth on the left thigh to prevent the lute from slipping.”
Some lutenists prefer to use a footstool under their left leg, holding the lute in much the same manner as the guitar, while others use a footstool under their right leg, elevating the lute into a more comfortable playing position. It is also not uncommon to cross one’s legs while playing (either left over right, or right over left) as this can provide enough support to comfortably hold the lute ( although Jakob Lindberg once told me that he used to have difficulty walking after playing concerts in this manner, being forced to bow and limp off stage with a frozen leg). It is important for the player to experiment with different postures (or combinations thereof) and seek out the one that can most comfortably and sustainably replicate the support one might expect from pressing the lute against a table.
Personally (and after years of experimentation) I now use a combination of two straps. One attaches to the the pegbox, slides over the shoulder and attaches to the end pin on the bottom of the lute. The other is attached to part of the main strap (near the endpin) and is then sat on and pulled taught. By adjusting the tension of this ‘sitting strap’ one can clamp the lute in place, snugly but safely. By changing the length of the main strap, one is able to adjust the vertical angle of the lute neck, and by changing the pressure and angle of the ‘sitting strap’ one can change the throw of the lute neck (forward and backward). Many professional lute players make their own straps, and the specifics of this will be covered in a later topic… Strapology!
The lute belly should also be tilted slightly upward, which aids in right hand string contact and overall sound projection. I use non-slip synthetic pads (found in home-wares stores and often used to prevent appliances from slipping on counters etc). They grip the lute extremely well and stop it from sliding off my leg (I really can’t play without one of these...one of the best investments you will ever make!)
Good Luck!
[1] Andrea Damiani, Method for Renaissance Lute, trans. Doc Rossi (rome: Ut Orpheus Edizioni, 1998), Manual, 15.
[2] Thomas Robinson, "The Schoole of Musicke," (London1602), Fol. 3r.
[3] Thomas Mace, "Musick's Monument," (London: T. Ratcliffe & N. Thompson, 1676), 71.
[4] Ibid.
[5] Damiani, Method for Renaissance Lute, 15.
Acquiring a lute can be a considerable challenge in itself as (unlike the guitar) lutes are not often found in local music shops. If, by chance, you do happen upon one, they are usually poor quality factory-made lutes that are more of a gimmick than a serious musical instrument. This often means that one must be prepared to purchase instruments from professional luthiers all over the world. As most luthiers will offer a range of instruments, it is important that one has an understanding of the style of lute that will best suit one’s playing.
Throughout the early-to mid-16th century, lutes were most commonly strung with 5 courses and a single treble string. This is explained as early as 1511 by Sebastien Virdung in Musica Getutscht:
I advise, therefore, that you take up a lute with eleven strings, [a type] that is found almost everywhere....First you must know that the eleven strings are distributed among six courses, always two strings for each course, with the sole exception of the sixth course which normally has only a single string. [1]
Each course was made up of either: two unison strings or (in the bass register) two strings pitched one octave apart. Historically inspired coursed lutes have a wonderfully rich and full-bodied texture while the octave (bass) courses add clarity to what would otherwise be a rather muddy texture.
As late Renaissance and early Baroque lutenists were experimenting with more complex and adventurous forms of harmony, there was a strong desire to see an increase in the harmonic capabilities of the lute. The six-course lute didn’t offer the harmonic flexibility needed to perform fugues or continuo, so gradually more and more strings were (quite literally) added to Renaissance lutes. Much to the dismay of historians, many 6 course Renaissance lutes were ‘cannabilised’ in the 17th century, fitted with extension pieces and new peg boxes to hold more strings.
Towards the end of the 16th century, it was not uncommon for lutes to be strung with ten or even eleven courses, and by the early 17th century lutes were built with upwards of fourteen courses (referred to as arciliuto (arch lutes) or theorboed lutes) and tuned in G, F or D-minor. Due to their increased volume and harmonic range, the arch lute or theorboed lute became the favoured solo instrument of Baroque lutenists.
Unfortunately, to play all the repertoire from the early Renaissance to the late Baroque, one would need a “minimum of a dozen instruments in order to cope with all of the different tunings and different types of instruments to fit the style of music that you're playing.”[2] For a touring musician, this is about as impractical as it is financially burdening.
As a result, many lutenists will choose the instrument that best satisfies the style of repertoire they are performing. For some, a desire for complete historical accuracy means early 16th century music can only be played on a replica 6 course alto lute. However, to an amateur lutenist, it seems a luxury (in light of the extensive repertory of lute music written for instruments of seven or more courses) to limit oneself to an instrument of only six courses. However, in doing so, certain subtle characteristics and physical qualities (of the six-course lute) will compliment the repertory in a way that perhaps later lutes do not. An example of this is given by Paul Odette, who notes “the early lute has octave strings in the bass, and so, in the case of a six-note chord, you lose three of the voices if you try to use a late 16th century lute.” [3] Likewise, If one chooses to play early Renaissance music on a ten-course lute, the extra diapasons will provide a sympathetic (or perhaps unsympathetic) resonance that was not necessarily desired by lutenists of the early 16th-century.
Another very important consideration is that playing music written for the 7 and 8 course lute on a 9 or 10 course lute is considerably more complicated and difficult, due to the order and number of the bass strings. In many 7 course pieces, the 7th course (usually low D or F) is used frequently as both an open string AND as a fretted string. Composers writing for the 7 course lute will voice chords and jump between the 6th and 7th courses in a way that takes advantage of the fact that they are adjacent strings. It is far more tedious on a 10 course lute because there are two bass strings in between the 6th and and what would normally be the 7th ( but is now the 9th) course. One can experiment with different ordering/tunings of the bass strings to help this issue, but it is certainly worth considering if one is mostly wanting to play music for the 6 and 7 course lute. It seems tempting to buy a 10 course lute as a ‘jack of all trades’ instrument that can play almost all of the repertoire for the alto G lute, but these are some of the inevitable draw backs of such a convenience.
Whilst this may seem an overly pedantic discussion, I am confident that after playing Da Milano or Narvaez on a six-course lute, one will find it somewhat unsatisfying to play the same music on a lute from the turn of the 16th century (just as a guitarist will likely find it unsatisfying to play Dowland on the guitar after experiencing it on the lute). Likewise, if one wishes to purchase a theorboed or archlute lute (to play the early Baroque repertoire) one will discover that the wide frets and the distance between the courses makes early Renaissance music considerably more fatiguing and demanding for both hands. In some cases, the stretches can be so severe that one is forced to sacrifice the full value of certain notes as the intended fingering is simply not possible.
Whilst these distinctions are undoubtedly idealistic, I aim only to illustrate the fact that one needs to take special care to choose the lute that best suits the repertoire for which one has a natural affinity. As there is an almost overwhelming selection of lutes available to modern players, start with the repertoire one loves, and find out what lute will best serve that repertoire. (If you still can’t decide, an 8 course lute is probably the best all rounder.)
Instruments in bold are common/good choices for all roundedness. Note: Course means a set of two strings - (A modern 12 string acoustic guitar could also be called a 6 course guitar.) Most lutes have a single top (highest pitch) string but this is still referred to as the 1st course. Diapason refers to a bass string below the normal 6 course register. You should be able to fret these strings down to a low C (depending on the lute) but at least down to a low D or 9th course on a 10 course lute and certainly all the Diapasons on a 7, 8 or 9 course lute.
6 course lute - Great for most of the quintessentially English lute manuscripts and any Vihuela music (Luis Milan, Narvaez, Early Italian repertoire such as Da Milano & large portions of the standard repertory of english lute music in the Holmes, Folger, Cosens and Robinson lute books). Tuning: GDAFCG
7 course lute - All of the above, plus pieces needing a low D OR low F (Most of the standard repertory of English lute music in the of Holmes, Folger, Cosens and Robinson lute books. Tuning: GDAFCG + (either F or D) Diapason.
8 course lute - All of the above, plus the ability to have both a low F and D diapason (or any two of the notes D, Eb, F or (depending on scale length) C ) - A lifetimes worth of repertoire - but an extra string to worry about in 7 course music and not enough strings for 10 course music. Common Tuning: GDAFCG+ (F and D) Diapasons.
9 course lute - All of above plus songs needing a low E/Eb or C (or any three of the notes F, E/Eb, D or C)- 7 course repertoire can be even more complicated to play due to bass string jumps. Common Tuning: GDAFCG + (F, Eb, & D) or (F, D, C) Diapasons
10 course lute - All of above, plus a diationic scale down to C in the diapasons. Very versatile for much of the French repertoire, the pavans of Daniel Bacheler, later Italian repertoire such as Piccinini or Zamboni and more contrapuntal/fugal works. Great for continuo playing but makes 7 course repertoire considerably more complicated to play as the low D is now a 2 diapason jump away from 6th course. Wider frets make early 6 course music harder to play (due to stretches), these instruments give more clarity between voices but less upper partial resonance and ‘shimmer’. Standard tuning GDAFCG + (F/F#, E/Eb, D, C) Diapasons
11 -13 course - Usually refers to theorboed lutes specifically in D-minor tuning. These instruments are suited to much of the early Scottish manuscripts , Weiss, and later baroque composers such as Bach. (Note: Instruments tuned in D-minor can’t play the renaissance G lute repertoire without significant retuning or re-ordering of almost all of the strings.) FDAFDA + (G,F,E,D,C,B,A) Diapasons.
14+ course - These are usually called archlutes or theorboed lutes in G (not to be confused with theorbos in A, or theorboed lutes in D-minor) with the bass ranging down to an F an octave below the 7th course. Archlutes are fantastic continuo and solo instruments that are perfect for much of the later Italian repertoire such as Piccinini and Zamboni (these pieces often finish with a low G to cadence in G major). Archlutes are excellent for continuo but not advisable for beginners due to size, string spacing and complexities of the bass register. They often have an extremely long neck to facilitate the register of the bass strings. Common tuning: GDAFCG + Fret-able (F, Eb, D, C) Diapasons +Non fret-able (B,A,G,F) Diapasons. Make sure you find one with a pegbox for courses (not single strings) as they are wonderful solo instruments.
14-19 string A Lute (theorbo) - You can usually spot the difference between a theorbo and an archlute because a theorbo has half as many pegs and is single strung. Theorbos are essentially a single strung archlute tuned a tone higher. The most distinctive feature of a theorbo is the re-entrant tuning, meaning the top two strings are pitched one octave below normal pitch. They are usually the preferred continuo instrument for most lutenists and an accessible instrument for guitarists due to the single stringing - one can still use nails. They are designed to be the loudest instrument of the lute family as they need to compete with singers and ensembles. They are known for having an extremely long neck to facilitate the low bass registers. Note: It is near on impossible to play any of the standard solo repertoire for the Alto G lute on the theorbo due to the re-entrant tuning. Commonly Tuned: AEBGDA + (G,F,E,D,C,B,A,G) Diapasons.
Traditionally, the best lute strings were made of lamb’s gut, and as a lutenist it was imperative that one was able to discern the difference between a true and a false string. Lute players went to great lengths to find the freshest and best sounding strings, purchasing them from specific string makers at specific times of the year. To test the quality of a gut string, Mace suggests:
[if] you find it [the string] smooth and free from knots, try its strength, by taking it at one end in both hands, pulling it so hard, till you perceive it strong, or rotten; And if it be a right good strong string, it will many times endanger the cutting into your flesh, rather then it will break.[4]
Sadly, most modern lutenists will never need such skills as the art of making fine gut strings has been all but lost. Whilst modern gut strings are still available for period instruments, they are highly susceptible to changes in humidity and are thus impractical to use when travelling. However, if the relative humidity and temperature of the climate can be loosely maintained, then gut strings have the potential to respond in a more predictable way.
A common alternative to gut strings are synthetic strings such as nylon, fluorocarbon (PVF) or Nylgut. Whilst nylon and PVF strings are better equipped to deal with humidity changes and less prone to breaking, they sustain far longer than gut strings, and are usually significantly louder (especially in the lower register). These qualities seem to align rather well with the aesthetic of modern guitar playing, where (to project in large concert halls) luthiers go to great lengths to increase the sustain and volume of their instruments. But to many lutenists, the added bass and overall sustain that is typical of nylon and certain PVF strings is a major setback that significantly changes the character of the lute. This philosophy makes a lot more sense when one considers the original performance aesthetic of Renaissance lutenists.
The lute was considered a dignified and delicate instrument, “used commonly at the going to bed of the kings of France.”[5] According to The Burwell Lute Tutor a good lutenist must “play neatly and in a little room or to please a small company (the lute not being fit to play in a hall before a multitude of people; there the violin is most fit.)”[6] It seems that the volumetric limitations of the lute were not only recognised, but celebrated by Renaissance lutenists. When one approaches the debate on strings from this perspective, increased resonance and volume is not necessarily desirable over a richer or more articulate sound. Or, as the Burwell Lute Tutor puts it, “like to a delicate stomach, a good bit and well seasoned doth more good than a great piece of beef and a great deal of other meat.”[7] As described by Andrea Damiani in his Method for Renaissance Lute:
Gut strings in the bass certainly do not vibrate as long as nylon strings, but they do have their own characteristics, such as the attack taking on a more vocal quality. Furthermore, less resonance makes the contrapuntal line more pure and transparent.[8]
However, the great dilemma facing lutenists of the 21st century is that modern nylon strings are “not satisfactory substitutes [for gut strings]….[but] they're the only substitutes we have if we want to play in tune in the modern life of a touring musician.”[9]
On the other hand, there is a compromise between gut and synthetic nylon called Nylgut. These strings have been developed by Aquila Corde Armoniche and posses a very similar decay and tonal characteristic to gut. They are available in a matte finish (NNG) or highly polished (NGE). NNG strings are more analogous to true gut and give the fingertips of the right hand more purchase on the course. The NGE strings produce less string noise (and are better suited for recording) but are more slippery and hence can be harder to grip with the right hand. Aquila also make a combination of different bass strings that mimic the sound and feel of traditional twisted gut such as the copper loaded red strings (CD). Although Nylgut strings do not posses the same tonal qualities as gut strings, they are one of the closest thing we have that allows lutenists to enjoy the benefits of the increased reliability and longevity of synthetic strings. Ultimately, as is the case with the guitar, the ‘ideal’ string will vary from instrument to instrument and it is only through experimentation that one can find the solution that best suits one’s instrument and ear.
During the 16th–17th century, lutenists were expected to know how to set up their instrument with movable gut frets. As a guitarist, used to fixed metal frets, this means one is now in control of the action, temperament, and intonation of the instrument. As the gut frets wear out, new ones must be tied to the neck of the lute, arranged in sequential gauges and tuned to an appropriate temperament. According to Mace, “if it [the lute] carry less than nine [frets], it is too short, and if more, it is too long; therefore nine is esteemed the best number [of frets] for a true sized neck.”[10] There are several variations of a noose knot that are used to tie a gut fret, but the most important thing is the way the fret is stretched into position. Mace instructs:
Take the fret (thus far fastened) and draw it so close (by both ends) as you can well, to stiffen it to the neck; then, (holding both ends fast in your left hand) with your right hand and left, force it down so low (towards [the frets] c. d. e. f..) as you can; then put it up again to the nut, where you will find it much too wide or slack; therefore take the ends, (in each hand one) and draw it stiff and close again…Thus do it three or four times, till at last you find it [the fret] stiff and close again.[11]\
What Mace is trying to say, in a rather unclear manner, is that one can make use of the natural taper of the lute’s neck (that widens as it reaches the belly of the lute) by initially tying the fret close to the nut (or previously tied fret) and then (once it is fastened as tight as it can be) sliding it up into position. This will automatically stretch the fret in place and can be repeated (as Mace suggests) to draw any slack out of the fret. It is important that the frets sit completely flush against the fingerboard, as any raised sections (especially at the top and bottom edge of the fingerboard) will dull the sound of the strings.
The frets must be arranged so that the fret with the thickest gauge is closest to the nut. The first fret (as it needs to be considerably thicker than the 9th fret) can be a diapason from a theorbo or viola da gamba and the next fret should be fastened with the same gauge, or with an incrementally smaller gauge string. Rather than needing nine different sized frets, it is possible to fret a lute with four or five different gauges of gut string, as long as the general fret gauge is reduced in a step wise manner until the last fret is reached. This will mean that, in places, two or even three of the same gut string can be used to tie sequential frets. The exact positioning of the frets determines the temperament and tuning of chords and intervals. Whilst Dowland (in his treatise A Variety of Lute Lessons) explains his rather methodical and scientific approach to tuning the frets, The Burwell Lute Tutor esteems that “the best way to place them [the frets] is by the ear, singing the gamut [solfeggio].”[12] Likewise, The Burwell Lute Tutor instructs the player as follows:
Strike an open string and sing ‘ut’ [do]; then[,] skipping one fret and laying the finger upon c of any string[,] you shall sing ‘Re’. Then skip a fret again and stop in e; it will sing ‘Mi’.[13]
Mace seconds the importance of tuning by ear, describing that “the best way [to fret the lute] is to place your frets as you tune up your lute, by your ear, according to unisons, 3ds, 5ths, and 8ths”.[14] Mace goes on to instruct as follows:
First , tune it [the lute] so well as you can open, (without frets) making all agreeing strings accord, in their several concords; and when you are so satisfied, then attempt the fixing of your frets to their certain places, and not before…and the more exact your lute is strung, the more readily will your frets find their places, and consequently your business of tuning the easier.[15]
Whilst this may seem a laborious task, movable frets gave Renaissance lutenists the ability to sweeten particular keys, chords, or intervals.
Long before mean tone, the first tempered scale was the Pythagorean scale, where all of the fifths (except one) are exactly in tune.[16] However, the more in tune one makes the 5ths, the worse the 3rds sound, and as a result 3rds in the Middle Ages were considered less consonant. Mean-tone temperament was designed to sweeten the 3rds and temper the 5ths so that some keys (generally those with fewer sharps or flats) sounded pure and harmonious. However, mean-tone temperament produces some 5ths and 3rds that are “wildly sharp, but these were kept in keys which composers took care to avoid.”[17]
Unlike equal temperament (a tuning system designed for fixed pitch instruments such as the keyboard or modern guitar) mean tone temperament was designed for movable pitched instruments (such as the voice, viol, or lute) and was the dominant tuning system of the 16th century.[18] In mean tone temperament “all 3rds [are] pure and 4ths and 5ths as nearly pure as possible.”[19] Whilst the exact positioning of the frets (in mean tone temperament) varies for every lute, by slightly adjusting the frets one will notice that some 3rds may sound sweeter and more resonant, while other 3rds or 5ths may sound dissonant or out of tune.
Unfortunately, as each fret covers multiple strings, any minute adjustments will simultaneously favour certain strings and compromise others. These are compromises that are on top of the compromises already inherent within mean-tone tuning. In other words, it is not possible to accurately capture mean-tone temperament on the lute unless each string was separately fretted. The tuning of the frets is certainly a balancing act that can be constantly adjusted (to suit certain keys) or left in an approximate ‘middle ground’ (equal temperament). Whatever the tuning “one must put them [the strings/frets] to the lute with curiosity.”[20]
Whilst the revival of the Renaissance lute has led many luthiers (inspired by strict historical accuracy) to make copies of traditional 16th century instruments, there are some makers who have approached lute construction from a 21st century perspective. These lutes are strung with higher tension nylon or carbon strings (not courses) and have an action and string spacing that is somewhere between a traditional lute and a modern guitar. This allows guitarists the flexibility to use nails on the lute, and thus the ability to play both the guitar and the lute with only a small technical adjustment. These high tension lutes share similar physical dimensions to traditional Renaissance lutes, but use a modern method of soundboard bracing (essentially guitar bracing) and often have fixed metal frets. These lutes make the production of a clean, resonant sound, more straight-forward and more reliable (compared to the somewhat precarious tone production qualities of historical lutes). In this regard, they have made significant advances from the lutes pioneered by the likes of Julian Bream in the 1960s, despite the apparent similarities.
It is true that an historically accurate lute of 10 or more gut courses with 19 wooden pegs and tied gut frets of varying thicknesses, is not exactly a practical instrument. It has certain sound qualities that are unique and very beautiful, but as most lutenists can attest to, tuning over 20 strings, tweaking intonation, and constantly monitoring and replacing frets can become a loathsome task. In fact, it has been suggested by some scholars that these hindrances are responsible for the lutes early demise. Jonathan Santa Maria Bouquet states:
As lutes continued to acquire supplementary strings, they became more difficult to tune and maintain. These hindrances, along with the rising popularity of violins and keyboards, pushed the lute almost to extinction.[21]
However, single strung lutes do not posses the indescribable, almost ethereal beauty that can only be made by a coursed lute. One who has the patience, willingness and curiosity to learn to play a coursed lute will be rewarded in the long run. If however a guitarist is wanting to dabble in lute playing (without compromising their technique on the guitar) a single strung lute will perhaps be a more practical instrument as one will encounter far less technical difficulties before one is able to make a satisfying sound on the instrument.
I used to own one of the aforementioned ‘modern’ lutes when I first started playing. It was fabulous at making a reliable & predictable sound and had a wide dynamic range. I enjoyed the instrument for a few years, but I could never fully satiate my curiosity and desire to play on an historic instrument. I felt a disconnect between the composer, the composition and my playing because of the lute I was using.
Making the switch to a coursed instrument was a real mental and physical challenge (and it took over two years to fully adapt to the new technique). But, having since come out of the other side, I could never go back. There is a real magic to coursed lutes and when they are properly tuned and plucked (in just the right way) the lute sings and has a warmth and texture that no other instrument can match. It makes interpreting the repertoire much easier and idiomatic traits of a coursed lute suddenly fall into place on the page. If you have the the discipline for it, playing a coursed lute is well worth the effort!
[1] S. Virdung and B. Bullard, Musica Getutscht: A Treatise on Musical Instruments (1511) by Sebastian Virdung (Cambridge University Press, 1993), 150.
[2] Paul O'dette, interview by Bruce Duffie, 1993.
[3] Ibid.
[4] Thomas Mace, "Musick's Monument," (London: T. Ratcliffe & N. Thompson, 1676), 67.
[5] J. Rogers and E. Burwell, The Burwell Lute Tutor (Reproduced under the direction of Leslie Hewitt for Boethius Press, 1660), 62.
[6] Ibid., 61.
[7] Ibid.
[8] Damiani, Method for Renaissance Lute, 14.
[9] O'dette, "Lutenist Paul O'dette - a Conversation with Bruce Duffie ".
[10] Whilst The Burwell Lute Tutor also states that 9 is the optimum number of frets, it is worth noting that this did not define the range of the Renaissance lute. As early as the 1560s Adrian Le Roy discussed the frets above ‘i’ (the 9th fret) which (as translated by William Barley) “have no frets at all, notwithstanding those that are expert in this instrument, stop the strings so certainly as though they had frets aligned them, and the letters that sometimes come after I, are these k, l, m, and n. but have no frets allowed them”
[11] Thomas Mace, "Musick's Monument," (London: T. Ratcliffe & N. Thompson, 1676), 69.
[12] Rogers and Burwell, The Burwell Lute Tutor, 16.
[13] Ibid.
[14] Mace, "Musick's Monument," 69.
[15] Ibid.
[16] Jeremy Montagu, "Temperament," The Oxford Companion to Music.
[17] Ibid.
[18] Ibid.
[19] Ibid.
[20] Rogers and Burwell, The Burwell Lute Tutor, 16.
[21] Jonathan Santa Maria Bouquet, "The Lute," The metropolitan Museum of Art, http://www.metmuseum.org/toah/hd/lute/hd_lute.htm (April 2010).
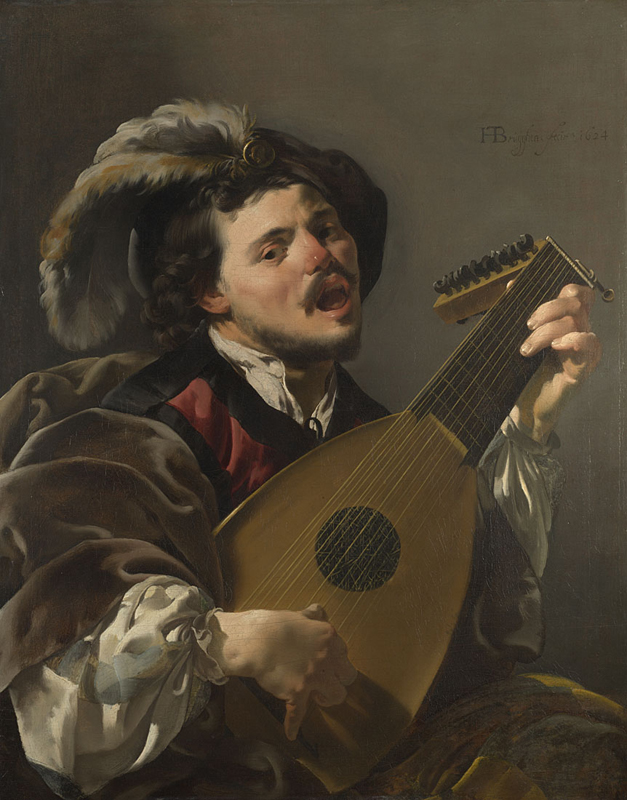
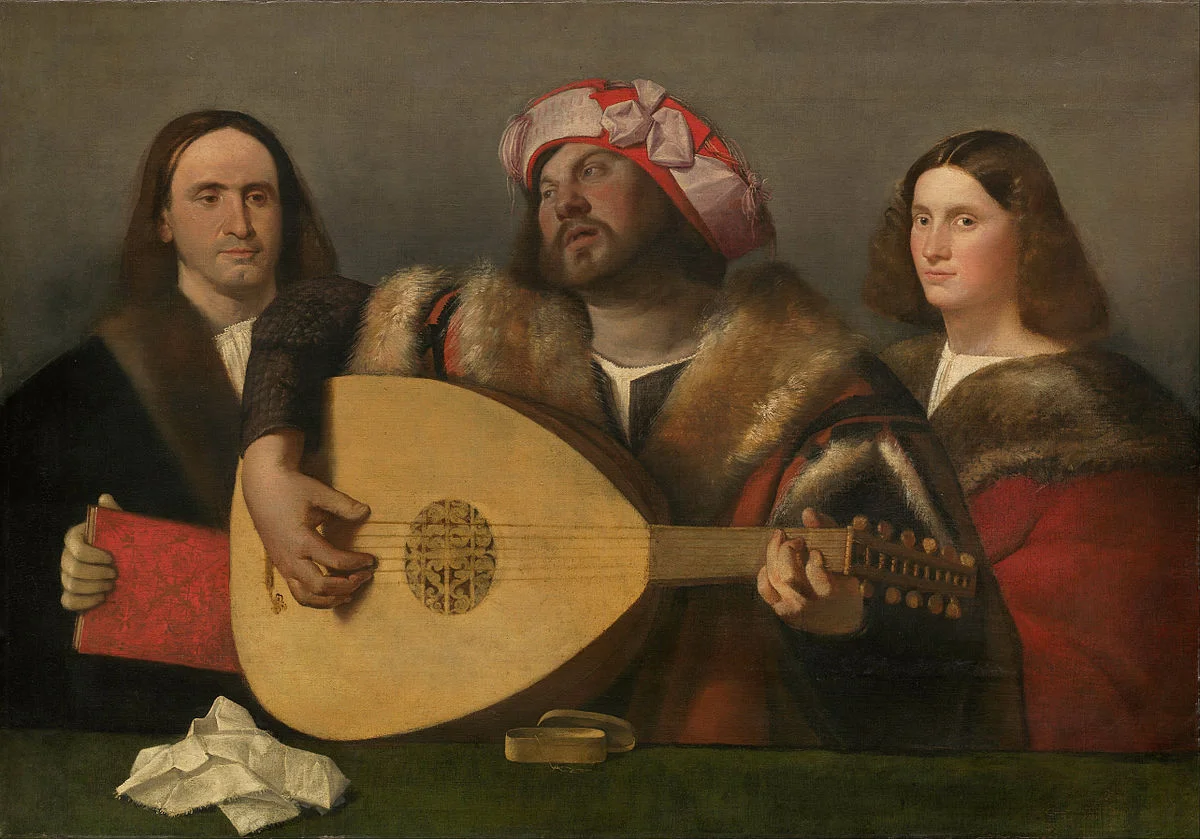
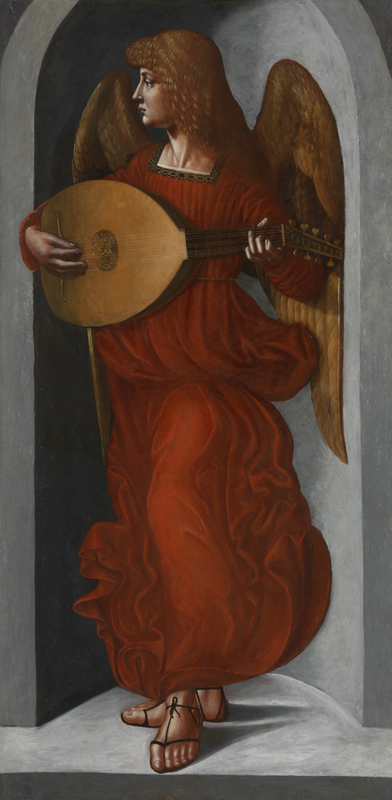
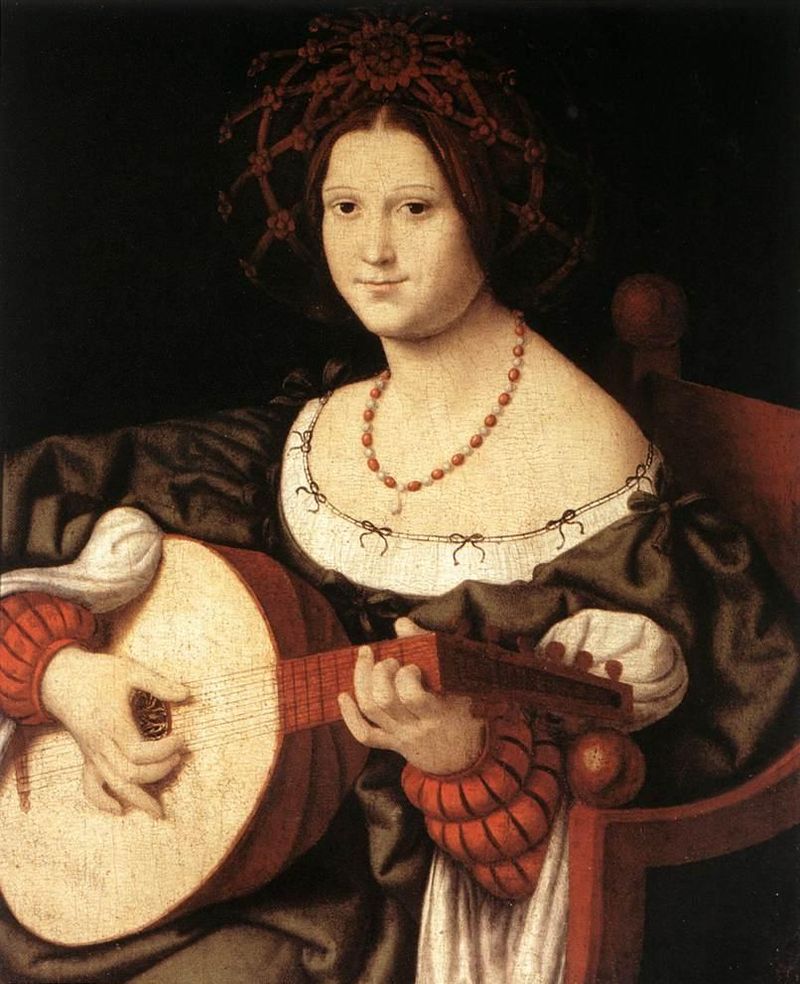
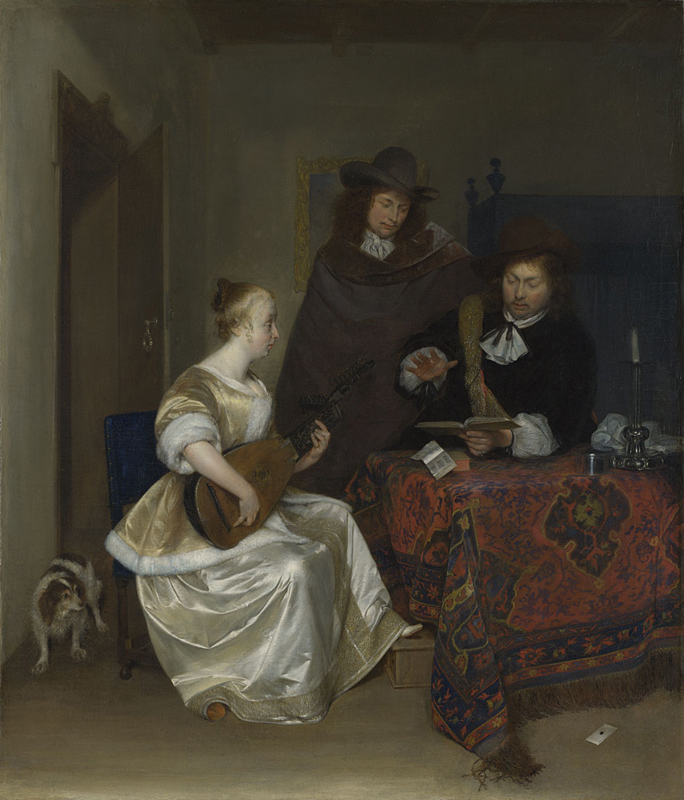
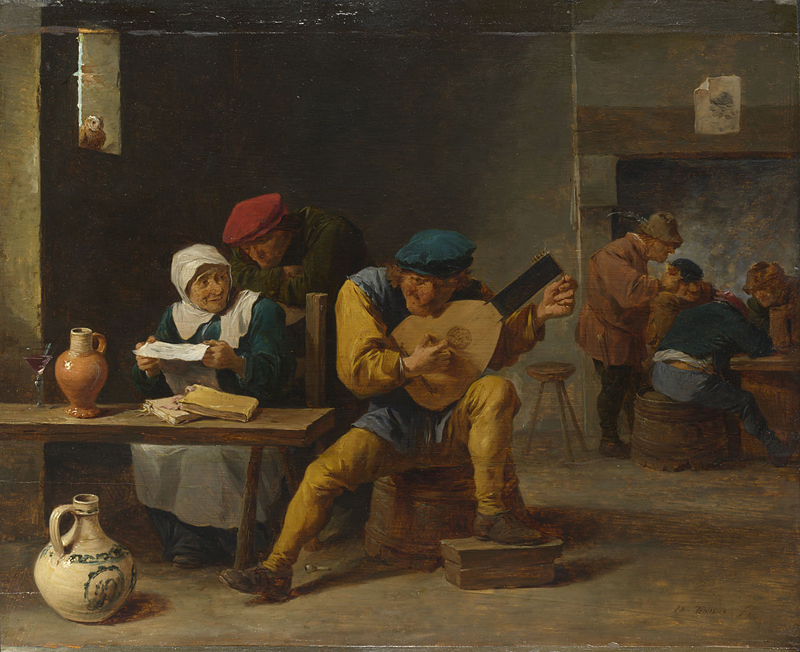
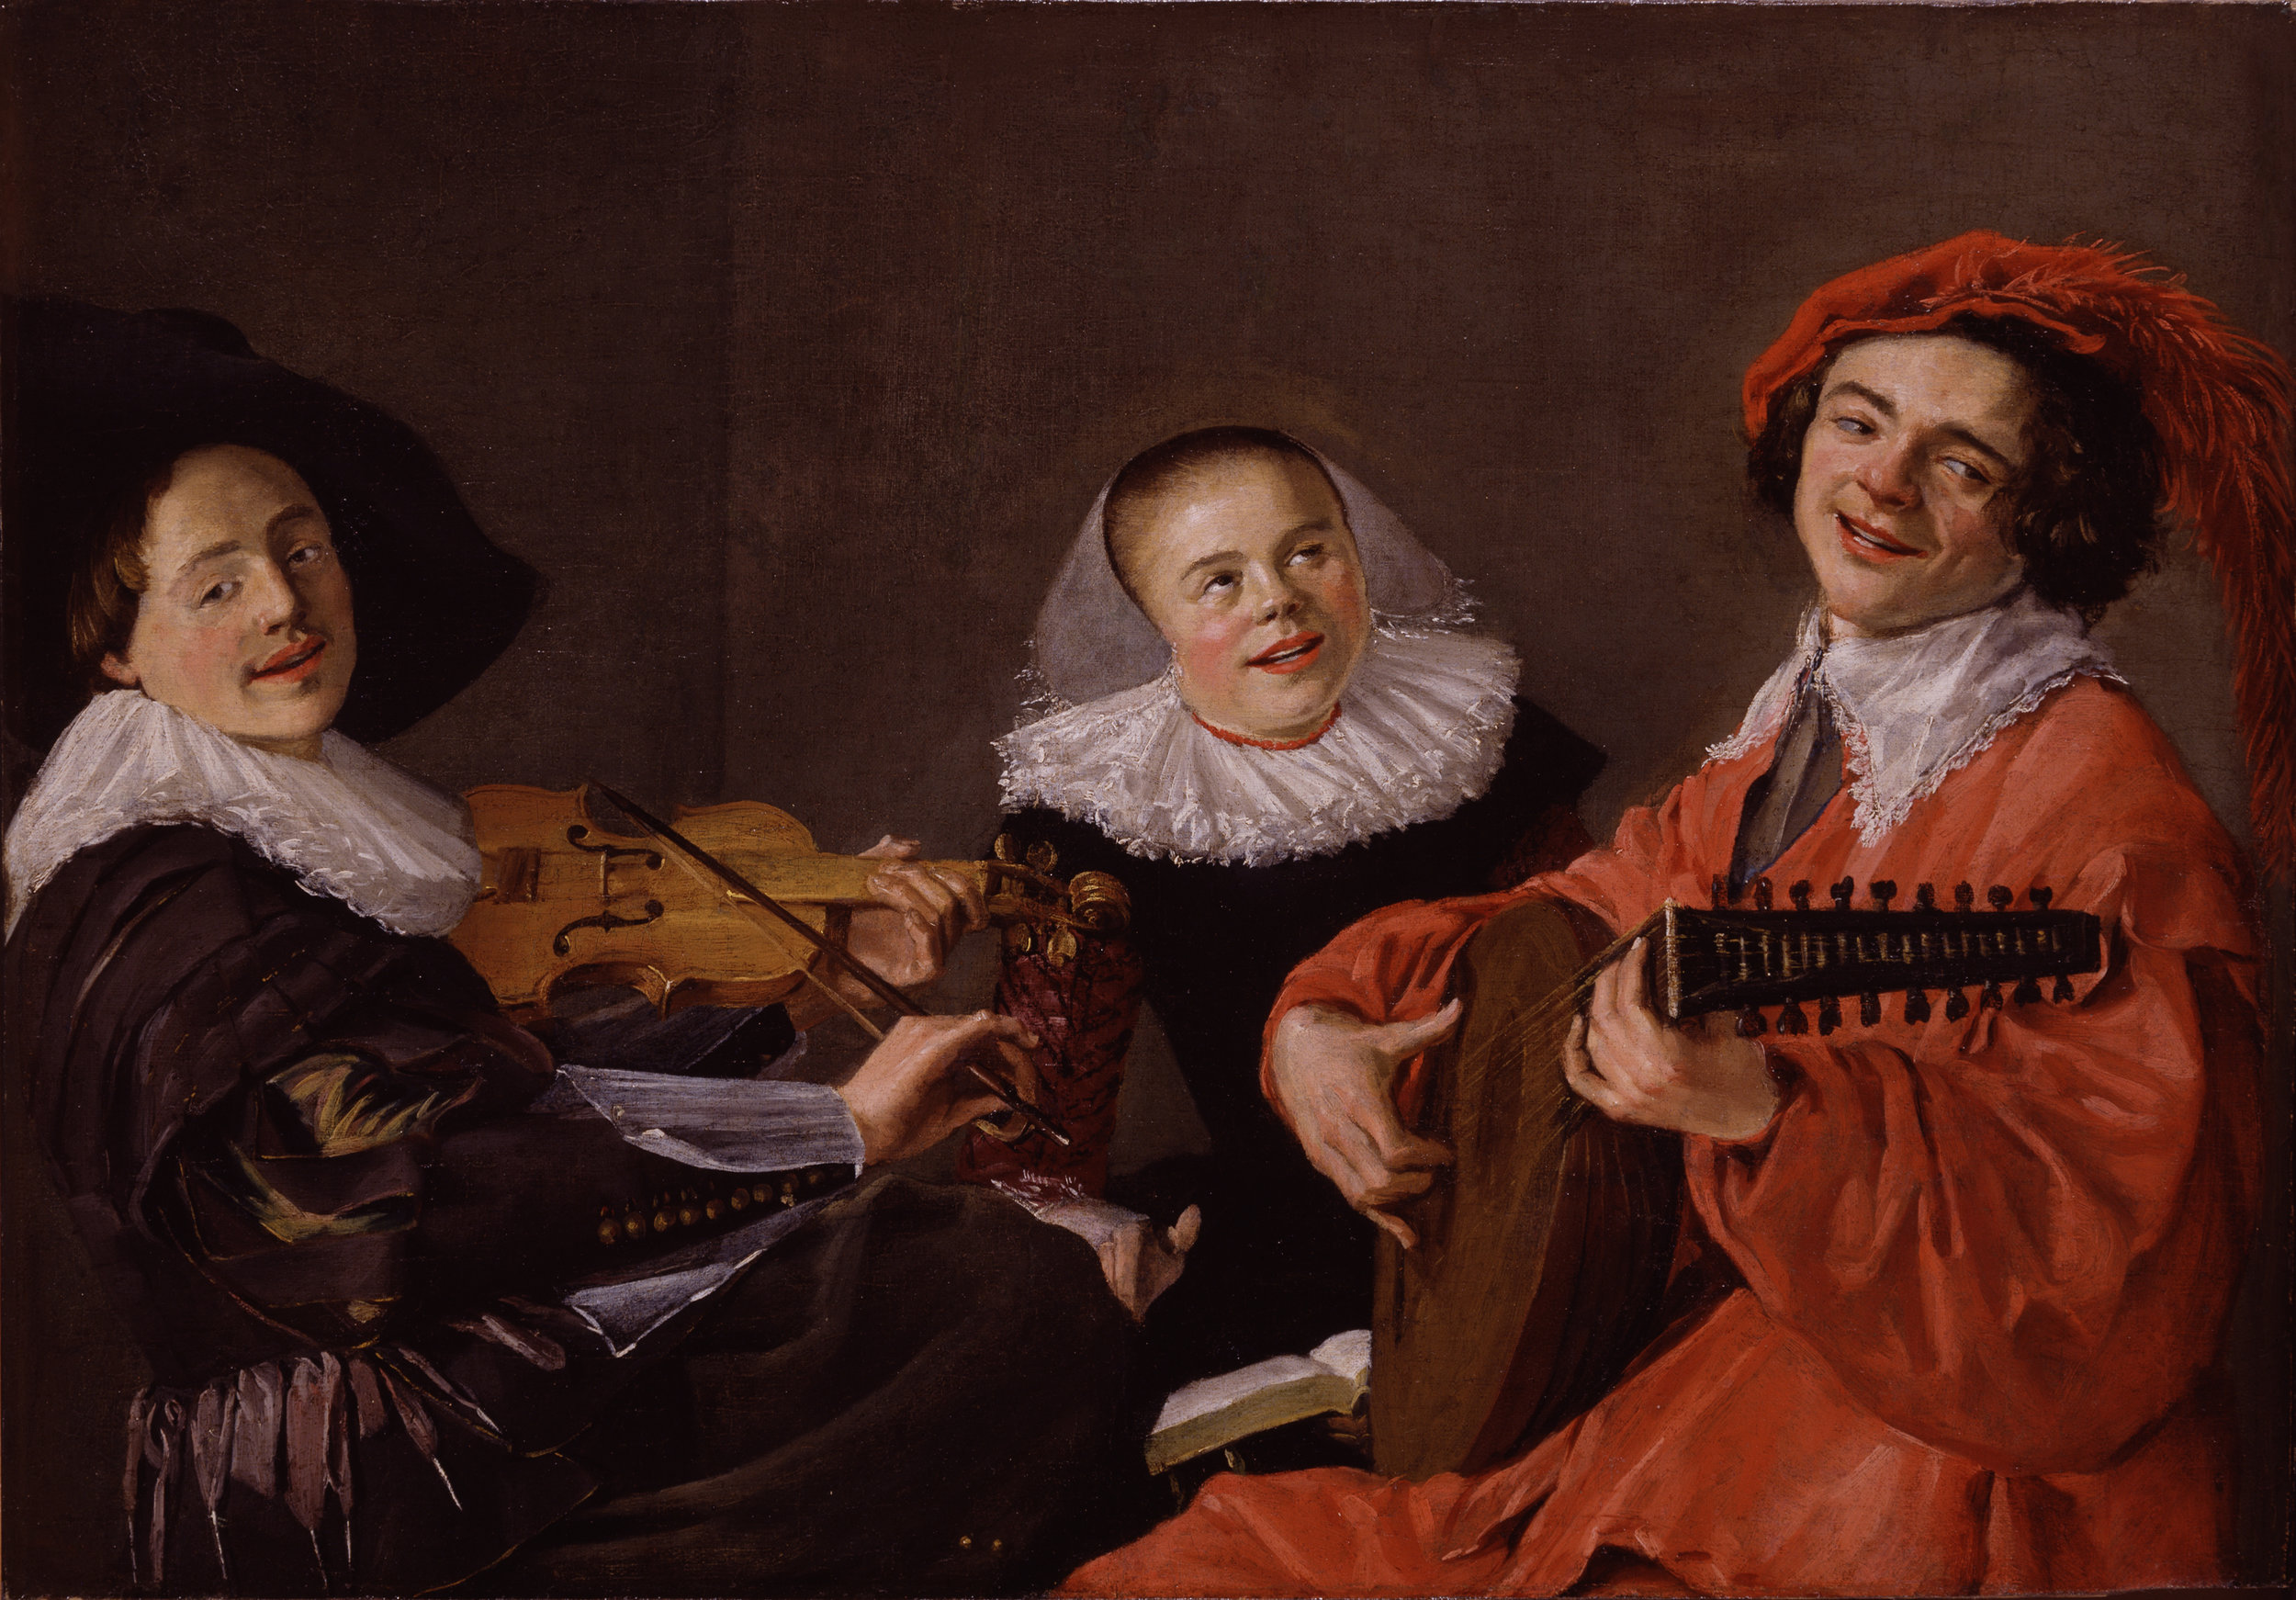
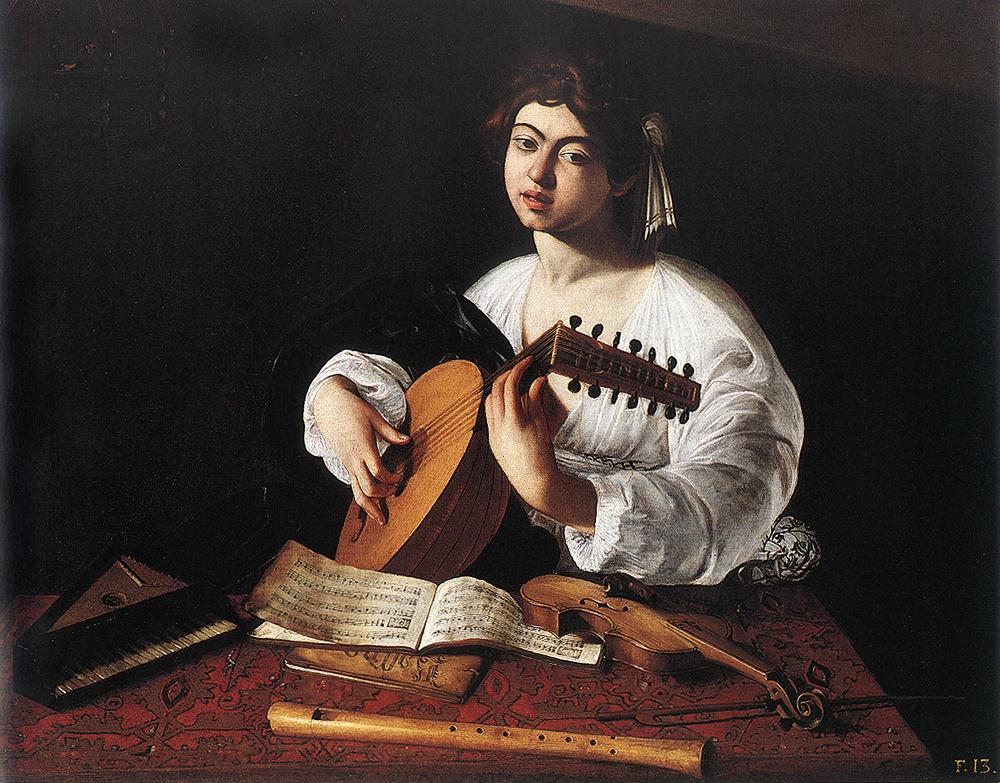
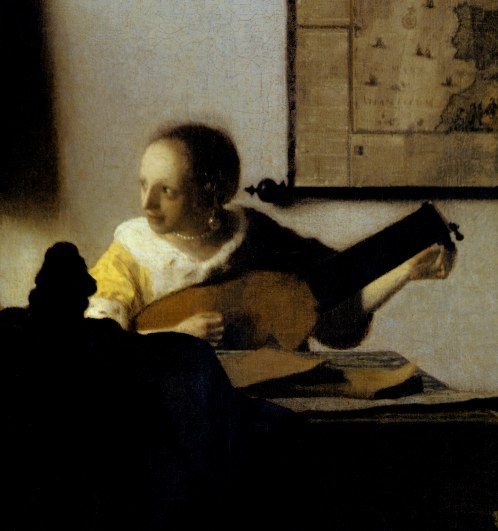
An on-going list of depictions of the lute in iconography.